patterns >  LittleOwlsHut's Ravelry Store and 1 more...
> 071 Bramblehog the Alien amigurumi


071 Bramblehog the Alien amigurumi
LANGUAGE:
English on Ravelry
SKILL LEVEL: Experienced
FINISHED SIZE: Approx. 20 cm (7.8 inches) tall, 30 cm (11.9 inches) long using the yarn and crochet hook stated in the pattern.
SKILLS REQUIRED:
Knitting (P, K) - for vest
Crochet in rounds
Single crochet
Increasing
Decreasing
Slip stitch
Double crochet
Basic sewing (assembly)
MATERIALS AND TOOLS
• Purple (main) color yarn for the main parts. I used Light Fingering/3 ply. 50% Alpaca, 50% Nylon (Polyamide), 50g/275m) – 3 skeins.
• Pink color yarn for the lower eyelids (of the same weight as the yarn for the main parts) – small amount.
• White yarn for the eyes and claws (of the same weight as the yarn for the main parts) – small amount.
• Tip: You can use any yarn that is suitable for the crochet hook 0.8-1.5 mm. I used the yarn approximately 50g/275m. If you use thicker yarn, the height of the toy will increase sufficiently. Make sure purple, pink and white yarn is of the same weight.
• Any eyelash yarn for the vest matching the color of the main yarn - 100 g. I used “Swan’s Down” by Nazar (100% Nylon (Polyamide), 100g/170m).
• Steel crochet hook. I used 1 mm (UK 6 ½, US 12) crochet hook for the yarn mentioned above.
• A pair of knitting needles 3.5 mm for the vest.
• Any stuffing.
• A pair of ready-made eyes.
• Sewing thread of matching colors for sewing small pieces.
• Tapestry needle for tightening and sewing needle.
• Wooden stick for stuffing hard-to-get places.
Tip: If you don’t have special sticks for stuffing, it is very convenient to stuff hard-to-get-to places using wooden sticks, toothpicks (if opening is very small), or brushes of different thickness with wooden handles.
• Four feathers matching the color of the body.
• White plastic matte beads for the teeth – about 40 (quantity depends on the size of the jaw).
• A pair of plastic fangs (you can make them using polymer clay (instructions are not given in the pattern) or crochet them instead (visit this page for crochet instructions http://goo.gl/2ezsc2)
• Strong thread for tightening.
• PVC single core copper electrical wire approximately 150 cm (59 inches) long 3 mm in diameter. Use only copper wire for the frame as copper can better stand bending compared to aluminum. You can buy it at electric supplies stores.
• Plaster - adhesive-backed fabric tape 1 cm wide to work up the wire (the one you use to cover wounds).
ABOUT THIS PATTERN
Pattern written using USA terminology
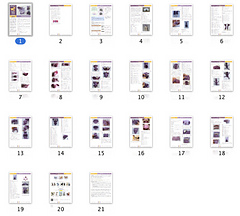
This pattern is easy to follow with step-by-step instructions (21 pages with detailed instructions, tips, photos illustrating the process)
DISCOUNT?
Add 3 patterns to your basket and get less expensive for FREE
MAY I SELL FINISHED PROJECTS?
Yes, You may sell Items made using this pattern (please read terms at the end of the pattern)
If you have an online shop where you sell items made from our patterns, you’re eligible to be included to our list of LittleOwlsHut-designed toy sellers, and get some free publicity for your shop. It’s 100% free service to you! Please visit (www.LittleOwlsHut.com) for details on how to apply.
DO I NEED SPECIAL PROGRAM TO OPEN FILE?
You will need Adobe Reader to open this Pattern. The program can be downloaded for Free at http://www.adobe.com
P.S. 30% discount on all my new patterns if you buy it within 48 hours of release! Subscribe to my Newsletter to be the first who knows about new patterns available for sale!

18 projects
stashed
9 times
- First published: April 2015
- Page created: April 27, 2015
- Last updated: January 18, 2020 …
- visits in the last 24 hours
- visitors right now


