patterns >
Emily Kintigh Designs
> Tool Set
![](https://images4-f.ravelrycache.com/uploads/AuntieEmsStudio/930444300/tools_1_copy_thumbnail.jpg)
![](https://images4-f.ravelrycache.com/uploads/AuntieEmsStudio/930444300/tools_1_copy_small2.jpg)
![](https://images4-f.ravelrycache.com/uploads/AuntieEmsStudio/930444291/tools_3_copy_small2.jpg)
![](https://images4-g.ravelrycache.com/uploads/AuntieEmsStudio/930444293/tools_4_copy_small2.jpg)
![](https://images4-g.ravelrycache.com/uploads/AuntieEmsStudio/930444290/tools_5_copy_small2.jpg)
![](https://images4-g.ravelrycache.com/uploads/AuntieEmsStudio/930444294/tools_6_copy_small2.jpg)
![](https://images4-f.ravelrycache.com/uploads/AuntieEmsStudio/930444295/tools_9_copy_small.jpg)
![](https://images4-f.ravelrycache.com/uploads/AuntieEmsStudio/930444297/tools_11_copy_small2.jpg)
![](https://images4-g.ravelrycache.com/uploads/AuntieEmsStudio/930444289/tools_8_copy_small.jpg)
![](https://images4-f.ravelrycache.com/uploads/AuntieEmsStudio/930444296/tools_14_copy_small2.jpg)
![](https://images4-f.ravelrycache.com/uploads/AuntieEmsStudio/930444302/tools_13_copy_small2.jpg)
![](https://images4-f.ravelrycache.com/uploads/AuntieEmsStudio/930444301/tools_12_copy_small2.jpg)
![](https://images4-f.ravelrycache.com/uploads/AuntieEmsStudio/930444308/tools_15_copy_small2.jpg)
![](https://images4-f.ravelrycache.com/uploads/AuntieEmsStudio/930444304/tools_18_copy_small2.jpg)
![](https://images4-g.ravelrycache.com/uploads/AuntieEmsStudio/930444287/tools_17_copy_small2.jpg)
![](https://images4-g.ravelrycache.com/uploads/AuntieEmsStudio/930444285/tools_21_copy_medium.jpg)
![](https://images4-f.ravelrycache.com/uploads/AuntieEmsStudio/930444288/tools_22_copy_medium.jpg)
![](https://images4-g.ravelrycache.com/uploads/AuntieEmsStudio/930444299/tools_24_copy_medium.jpg)
![](https://images4-f.ravelrycache.com/uploads/AuntieEmsStudio/930444292/tools_23_copy_small2.jpg)
Tool Set
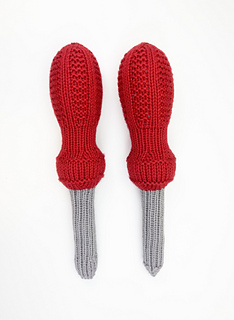
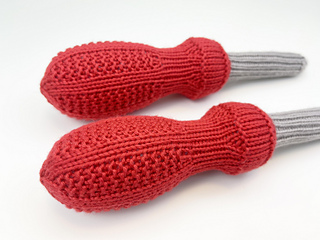
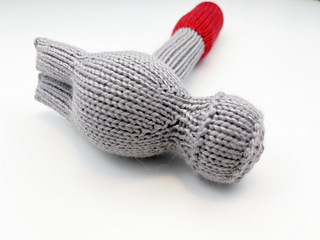
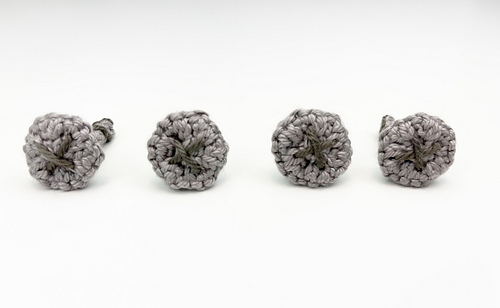
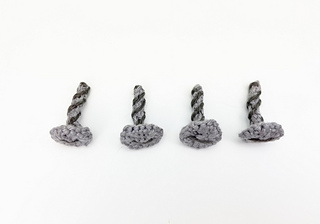
This adorable knit toy set is perfect for any little builder. The pattern includes directions to make a Philip’s head screwdriver, a flat head screwdriver, a saw, a hammer and nails and screws.
Notes from pattern:
Notes:
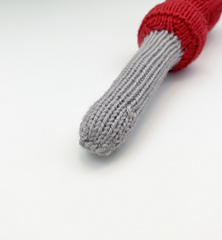
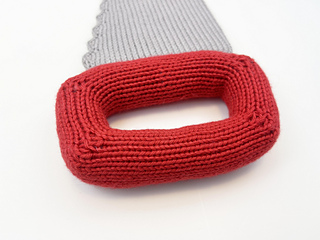
-All pieces are worked in the round except portions of the saw handle. The saw handle uses short rows (worked in the round) to form the corners as well as a provisional cast on and grafting using kitchener stitch. The screwdrivers are worked in one piece. The saw and hammer are each knit in two pieces.
-Fusible interfacing is used in the saw blade to help it hold its shape.
-If only making the tools (not any nails or screws) one skein of C1 should be just enough.
Measurements:
Measurements are approximate, size will vary slightly depending on stuffing. Screwdrivers: 9” long x 6” around handle Saw: 11” long x 5” wide at handle Hammer: 9.5” long x 4.5” around handle Nails and Screws: 1.25” tall x .75” across
Needles:
-US Size 2 (3.75mm) DPNs or long circulars for Magic Loop Method
Yarn:
- Knit Picks Shine Sport Weight yarn- C1-Robot, 2 skeins; C2-Serrano, 1 skein
Notions:
-Yarn needle
-Stitch markers
-Stuffing
-9” x 5” piece of 72F Peltex ultra firm 2-sided fusible interfacing (slightly larger than needed to be cut down to size)
-Dark gray embroidery thread or scrap yarn
Gauge:
28 sts and 38 rows= 4” in Stockinette St
20457 projects
stashed
16135 times
- First published: June 2023
- Page created: June 22, 2023
- Last updated: June 23, 2023 …
- visits in the last 24 hours
- visitors right now