patterns >  Tinna Thórudóttir Thorvaldsdóttir's Ravelry Store
> Whoopa CAL


Whoopa CAL
NEW CAL by TINNA starting November 1st!
This time we’re gonna make this quick cozy cardigan together in a 10 Crochet ALong. The CAL is hosted in my Facebook group, Tinna’s Crochet Club, where you can get support from my admin team. I will also be doing daily video tutorials during the 10 days of the CAL, where I break the cardigan down in 10 parts so we can all crochet along and make this quick and easy cardigan together.
The CAL starts, on november 1st. At that point the whole pattern will be available here and I’ll start publishing the daily videos then as well. The Cochet along will run for 10 days, November 1st - 10th. In the videos I will be doing the Large short version of the cardigan.
the video tutorials for the WHOOPA CAL are available on my YouTube Channel:
https://www.youtube.com/channel/UCCLETbuS9Y_v1o2BpSjj-oA
The pattern will be available on 50% discount during the CAL, no code needed, you will see the discount added automatically before finishing your purchase.
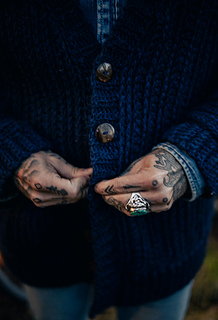
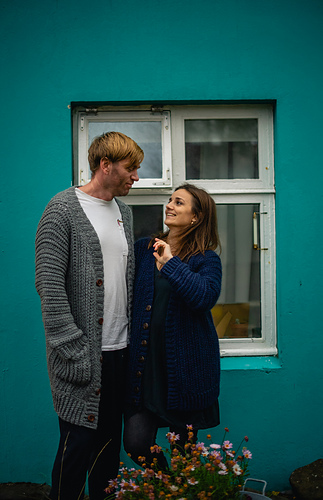
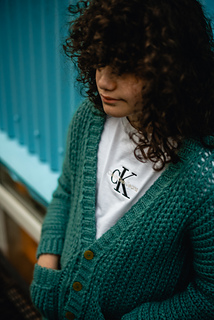
I absolutely love my big slouchy Whoopa Cardi made in Alafoss lopi. It’s super soft and cozy and just perfect to battle the winter! And it goes with everything, both jeans and dresses. On top of that, it’s 100% unisex and the first one I made was for my husband. After I kept stealing his, I quickly made one for myself too and have made many since.
I decided to call it the Whoopa Cardi because it´s actually quite a quick make, I make one easily in a week, or 10 days like we will do in this Crochet along. It´s a very simple pattern too, because you make the cardigan all in one piece, from side to side! Easy peasy and then whoooopah your done. If you‘ve been shying away from making wearables, then this is a perfect first try! I‘ll be holding your hand the whole way through it too, no worries, you‘ve got this!
Hooks
6 & 7 mm hooks
Yarn
Alafoss lopi from Istex
Medium short version 8 x 100 g skeins
Large short version 10 x 100 g skeins
Medium long version 12 x 100 g skeins
Large long version 14 x 100 g skeins
Other supplies
4-8 buttons, or as many as you want
I will sometimes substitute the buttons with a bit of a leather string and just tie the cardi together.
Gauge
Approx. 7 rows & 11 ST in HDC = 10 cm
Refer to the half double crochet texture instructions for the gauge swatch and note that we want a rather loose gauge because it’s a big cosy slouchy cardi!
Sizes
The cardi comes in 2 predetermined adult sizes, medium and large, and you can choose either the long or short version for both sizes.
Now, this is a big slouchy sweater that really fits lots of body types since you can wear it open (I always wear mine that way). I explain in the pattern how you can easily adjust the sweater to make it wider. You can also go up in yarn weight to get a bigger size. For a smaller size you can work the medium size and go down in yarn weight.
You can either block the sweater normally flat or you can use my special method for “slouchy blocking” where I hang it to dry. When you use this slouchy blocking method with wool yarn then the sweater grows quite a bit length wise and also gets a very nice slouchy, smooth feel to it.
Circumference of sweater: approx. 100 (110) cm wide
Length from shoulder and down: approx. 60 (80) cm before blocking or if blocked flat. Or 80 (100) cm after special slouchy blocking when using wool.
Length of sleeves: approx. 35 (40) cm before blocking and if blocked flat. Or 40 (45) cm after slouchy blocking when using lopi or wool.
Please note that I keep the sleeves rather short on purpose, because the stitches lie in a way that the sleeves tend to stretch a bit once you start using the sweater.
Circumference of the sleeves is approximately 31 (35) cm at bottom and 36 (40) cm at the top
Abbreviations (US terms)
ST = stitch/stitches
CH = chain stitch
SS = slip stitch
SC = single crochet
HDC = half double crochet
General instructions
The sweater is worked flat, back and forth, all in one piece sideways from the tip of one sleeve to the tip the other sleeve and is then sewed together on the sides and under the sleeves. You then add the front panels (this is worked right on to the big piece so no sewing there), then the ribbing on the sleeves and at the bottom of the sweater. Then you do the button-bands and all over the neckline. Lastly you add some pockets if you like, and sew on the buttons.
20021 projects
stashed
17440 times
- First published: October 2022
- Page created: October 21, 2022
- Last updated: June 21, 2023 …
- visits in the last 24 hours
- visitors right now


