Began it with sock yarn, didn’t like the look or feel of it, so ripped it out. Began again with the same needles and some strange (synthetic) yarns - one an olive drab and the other several very fine strands of industrial yarn together.
Progress was slow, only because I didn’t work on it often - only when it was necessary to have a small, compact project in hand - like when flying.
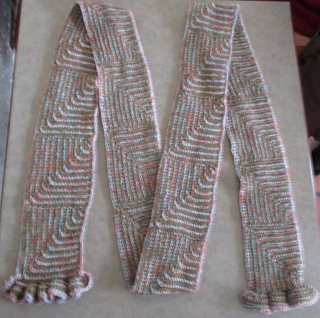
The original pattern states to make 7 squares. I had too much yarn and just kept going until I’d made 17; mine’s almost 8’ long. I wear it doubled with the ends pulled through the loop under my chin.
Where each new square began, there’s a ‘dimple’ in my edges. So, I worked a round of single crochet all around; dimples vanished.
If I do it again, I’ll probably use heavier yarn and bigger needles as well as add more stitches, because I live in Montreal, where a heavy scarf is more useful in winter. Thin as mine is, it’s only good between -10C and +5C; = spring and fall, not winter.
In use, the mitered squares deform into rectangles.
I used two contrasting yarns and changed colours every two rows.
To form my two-tone mitered squares, I:
- slipped the first stitch knitwise on every row;
- purled the last stitch on every row;
- changed colour every two rows by bringing up the new colour from under the current one and working the last stitch with the new colour;
- then I turned the work, twisted the two strands so that the old one is ‘locked’ and hanging out on the edge - ready for the next colour-change - and began the next two rows;
- I worked the double center decrease as (k2tog) twice at the center of my even number of stitches.
I used a crochet-hook cast-on.
I like the striped side - upper photo - and my husband prefers the other side.
May 11, 2018
Photo of completed scarf taken by Ginette on November 29, 2015 … and just discovered never opened in my Yahoo inbox!


 JessicaJean notebook
  handspun
 queue
queue favorites
 friends
 needles & hooks
 library