Aunty Yvonne gave me a copy of the pattern b/c she is knitting it for Caitlin. It is the first time she has used circular needles, the first time she has knit a top down pattern, the first time she has knit a seamless pattern and the first time she has used German short rows. I wanted to be able to help her if she ran into trouble and it looks to be a lovely, simple pattern that will knit up quickly, and Thea likes it, so I decided to knit it up.
Added two extra rows in back “yoke” area in order to get the right armhole length. Also added two extra rows in each front between the short row section and the neck increases b/c I figured if the back needed extra rows so would the fronts.
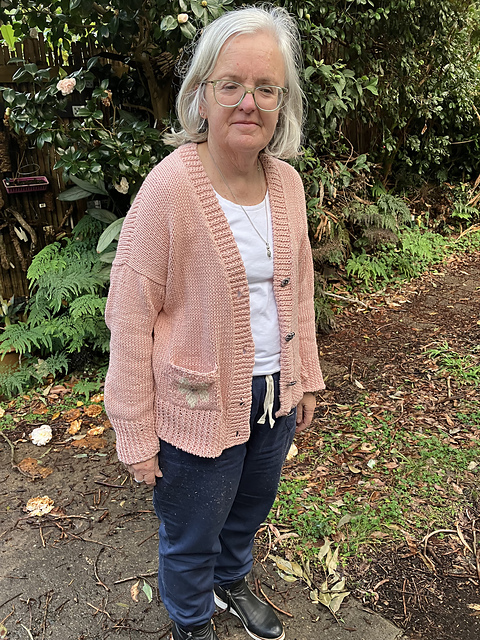
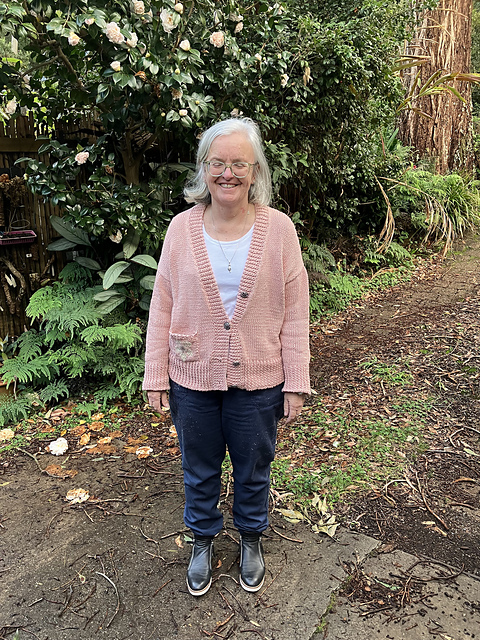
After talking with Thea, I think I will add a pocket on each side at the front - this will be done after everything else is finished. It might need a fabric lining.
Given that cotton has no elastic recoil and is quite a dense/heavy fibre, I am concerned a little bit about the garment stretching out of shape around the neck and shoulder area. This won’t be helped by the fact that the cast on is quite elastic. I am considering either threading in some knitting elastic along the cast on and some of the neck line after it is finished (would need to be done after blocking) or adding some crochet stabilisation (would be more bulky).
I don’t think I will go down a needle size for the ribbing on the bottom hem, but I will for the button band/neckline, and probably also will for the cuffs.
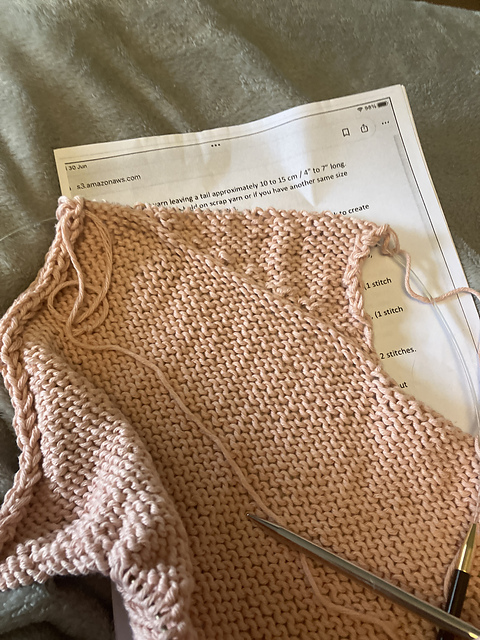
I forgot that I am sloppy at picking up stitches and need to use a smaller needle, so I had to go back and tighten up the picked up stitches for the left shoulder - it didn’t take long, though
Love the tubular bind off for the bottom hem - I had to cut more than 4m of yarn in order to do it, though, and that is quite a length to be wrangling through the stitches with a needle. This is what my little mnemonic was:
Knit Off Skip Purl
Purl Off Through Knit
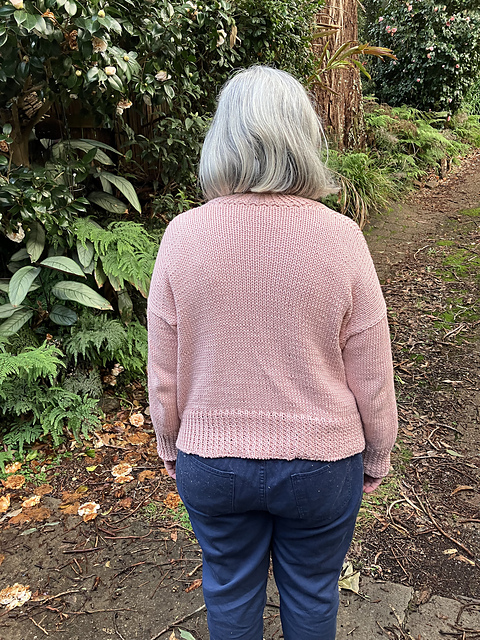
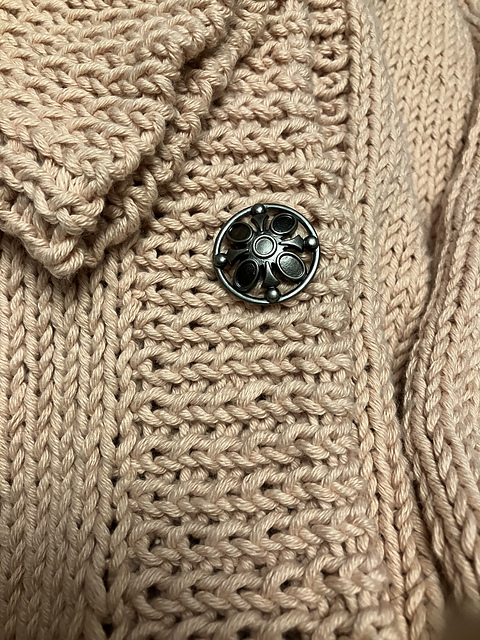
Decisions for the hem ribbing: I didn’t want it to pull in b/c that can be quite unflattering on people with larger bottoms/hips (as per the women in my family), and our very warm climate doesn’t require the hem of cardigans to be closely fitted, so I decided not to go down a needle size. On the other hand, I am using a pure cotton yarn (no elasticity at all) and quite large needles and, after three rows of normal 1x1 rib I was worried that it was just going to look floppy and unstructured, and also prone to just pulling out flat and out of shape. From then on I just did a ktbl instead of a normal knit stitch (both sides) … I think it might be called “half twisted rib” or something. This has definitely resulted in a more structured rib section that is far less likely to pull out of shape. I didn’t foresee, however, that it also results in a somewhat more decorative appearance, with the knit columns looking sort of braided and every second row in the purl columns having a slightly larger “hole”. I am hoping that it doesn’t bring too much interest to the ribbing in what is supposed to be a very plain and simple design. Thea likes it, though, so that is the main thing. I plan to make the cuff and button band ribbings match the hem ribbing. I might need to do a non-stretchy bind off on the button band, though …
NB: the cuffs will be done in the round, so the ribbing will need to be:
Round 1 - ktbl, p
Round 2 - k1, ptbl 

in order to match the ribbing at the bottom of the body
Sleeves
Used a 5.5mm needle to pick up the stitches - using a smaller needle just for picking up works well for me in mitigating the the tendency for my picked up stitches to look sloppy. I was feeling lazy and was worried about picking up the right number of stitches and skipping rows in appropriate places and having the fullness nicely distributed etc etc etc, so I decided to just pick up 1 stitch per row the whole way around and rapidly decrease the excess stitches. (NB I had two extra rows in the back and two extra rows in the front.) This gave me 88 stitches, which was 26 extra (!). To get to the correct number, I marked the centre under arm stitch and then the 15th stitch either side of that (actually, for the first sleeve I didn’t count well and didn’t use stitches out far enough) and used those stitch columns as the centre for CDDs, starting the first round of knitting and then alternating with plain rounds. After the 7th round of knitting, the stitch count had reduced to just two above what it should have been. The eighth round should have been the first round of decs per the pattern. For the first sleeve, I just did the decs per the pattern in the eighth round and did one more CDD in the centre under arm column in the ninth round. For the second sleeve, I think I will hold off on the pattern decs until the ninth round and have them bracket that last CDD. Anyway, this way of picking up way too many stitches and then decreasing them rapidly under the arm in three places has actually made a nice little gusset that I am rather pleased with! I didn’t plan it that way. The raised column of stitches that is formed by a CDD might be off-putting for some people, so a different decrease method might be better for them, but it works!
The other thing to note about my sleeves is that the first one appears tighter on Thea’s try on (before I had finished the pattern decrease rounds) than I had anticipated, but it is still lovely! I am thinking that my row gauge could well be coming into play here, resulting in the sleeve getting smaller more quickly than anticipated - ie, I should, perhaps, have put an extra round between the decrease rounds in order to space them out more … or maybe the gauge swatch I did before starting lied to me (I find that they usually do ). I will do the second sleeve decreases the same as the first sleeve so that they match  .
.
Nope - the sleeve measured almost 33cm when I had finished the decreases so I only added three extra rounds. If I had put extra rounds between the decrease rounds the sleeve would be too long.
Ribbing
All ribbing was done so that when knitting flat all knits were done tbl (on both sides). In the round, this translates to:
Round 1: ktbl p1
Round 2: k1 ptbl.
This results in a ribbing that should resist relaxing out flat, as k1 p1 ribbing in pure cotton yarn is prone to due to the total lack of elastic recoil in the yarn. The ribbing with twisted stitches looks just a whisker more decorative and prominent than normal ribbing, but neither Thea nor I mind the look on this otherwise very plain cardigan. In order to keep the preferred measurements and prevent the bind off edges on the cuffs and button band from stretching out of shape, the last two rows/rounds of the cuffs and button band are done so that every second stitch is slipped rather than worked. I think this is going to be very effective. The bind off is the sewn/tubular/Italian bind off as per the pattern - I love it!!! I actually worked one more row on the button band than the pattern calls for b/c the slipped stitch rows are not as tall and I still wanted the band to come across far enough after the button holes. The bind off is the same no matter what side you do it from, so that worked out well.
Other button band things
After the button hole row, I went down to a size 3.75mm needle just for the stitches behind the neck, I think this will help prevent that area from stretching out of shape with the weight of the garment under gravity (once again, cotton yarn has no elastic recoil so is more likely to stretch out of shape). I also considered threading in some knitters elastic or even doing some single crochet right along the cast on edge across the shoulders and back neck for the same reason, but we might just leave it for the moment and see how it goes.
I did the button holes basically as per the pattern with the spacing adjusted to account for my different row gauge. They are two row, two stitch button holes. To try to combat some of the gaping of stitches that can sometimes happen around button holes, I wrapped the yarn around the stitch preceding the bound off stitches. I used a cable cast on to replace the bound off stitches when I came back on the second row. I should have cast on an extra stitch and slipped it over the following stitch to help it all stay tidy but I forgot, so now the stitch after the button hole cast on stitches is pulled out of shape. Too late now!!! not to worry - it still works perfectly well.
A note on button/hole placement. The bottom one is as per the pattern - towards the bottom of the ribbing. The next one up is also as per the pattern. This places it right at the top of the ribbing as it transitions to stocking stitch. This is important to prevent gaping when the garment is closed if there is to be any stretch put on the ribbing. The top button/hole is at the bottom of the V neck shaping, as suggested by the pattern. The remaining button is placed halfway between the top button and the button at the top of the ribbing. I found it easiest to tell where this was simply by counting the rib ridges and marking where the halfway point was.
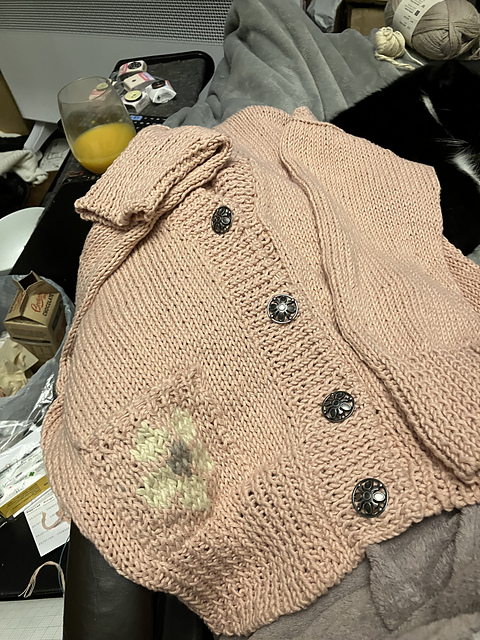
The pocket(s)
Oh dear!!! The idea was good but the execution was sadly lacking  !
!
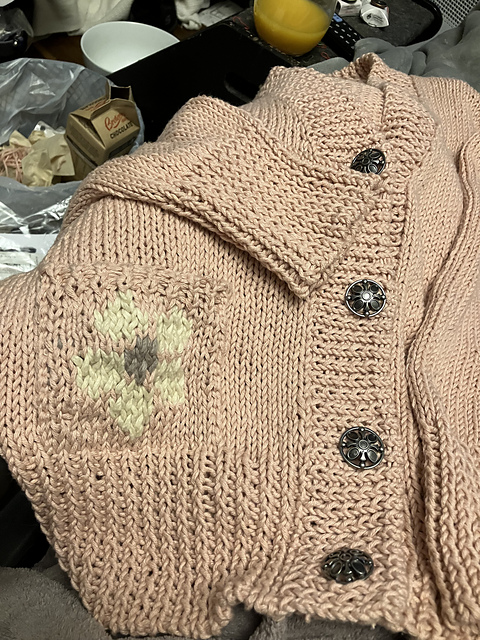
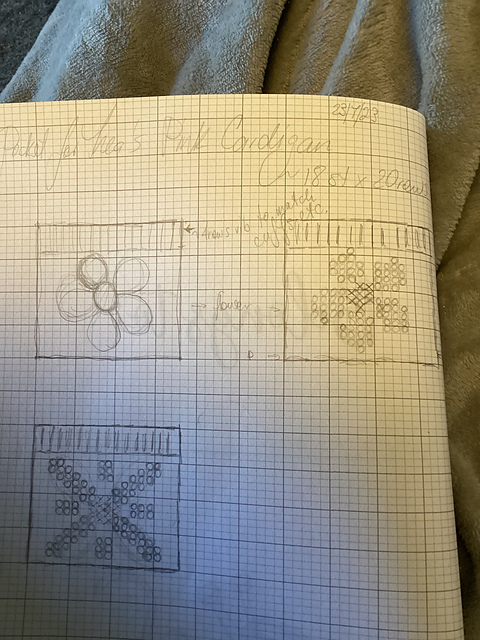
I laid the cardigan out with the buttons closed and used stitch markers to mark where I thought a pocket might go, checking that the size I marked would fit my hand inside. Then I got Thea to try it on to make sure the placement and size would look ok. Next, I placed markers in the same positions on the other cardigan front b/c I thought that I would do a pocket on both sides. I had done a pocket like this before but had forgotten the actual details so I was making it up as I went along. The idea was to try to make the the pocket look continuous with the fabric of the cardigan. First, though, I got out my knitter’s graph paper and marked out a rectangle the right size for the pocket, making sure to leave a few rows for the ribbing. Then I drew a flower of the kind that Thea liked. I then converted this drawing into a more structured graphic representation in order to know what I was doing with my colourwork (although, some kind of textured work using the same graph would probably also be effective). Now I was ready to start the construction. A crochet hook was necessary in addition to the knitting needles. Also, I used a smaller knitting needle for the first (cast on) row of the pocket but went back to the same size needle as for the cardigan body for the rest of the pocket.
So, it is easier if you have the buttons undone. Start with the right side facing you and the yarn on top of the garment. The idea is to pull up a loop of yarn using the crochet hook through the centre of each of the garment stitches and place it on the knitting needle, along the base of where you want the pocket to be. If you don’t have the yarn on top, you won’t be able to continue knitting with it to create the pocket. If you really want to be able to start with the yarn in the back and simply pull up a single strand to create stitches, then you would need to have this “pocket cast on row” as a separate piece of yarn. I’m not sure which method would produce a better looking or more secure result, but the separate strand of yarn would mean more tails to secure. Anyway, in the method I used with the yarn on top of the garment, to create the first loop, you put the crochet hook through the centre of the stitch where you want the bottom corner of the pocket to be and back up through the stitch next to it that is not going to have any overlaying pocket stitches. Grab a loop of yarn with the hook and pull it down through that outside stitch and back up through that stitch where the first pocket stitch is to be. This loop is the first of your pocket stitches. Put it on your knitting needle. The yarn tail will be pulled down to the wrong side of the garment for weaving in once the pocket is finished. To create the next pocket cast on stitch, put the crochet hook down through the next garment stitch along the base of where the pocket is to be and up through the centre of the garment stitch where that first pocket stitch is, grab a loop of yarn and pull the loop down through that first garment stitch and back up through the second, and place the loop onto your knitting needle to create your second pocket stitch. Continue along, putting the crochet hook down through the next garment stitch, back up through the stitch where you just created a loop, grabbing a new loop, pulling it through and putting it on the knitting needle, until you have created the number of pocket stitches that you want. Now, I am a VERY lazy knitter, so I didn’t want to have to do any sewing. A crochet hook was my friend b/c it enable me to knit the pocket on as I went. My idea was to get the pocket stitches to neatly sit on top of the garment stitches at the sides, so I pulled side stitches through the centre of garment stitches but I actually think I would have been better off pulling them up between the garment stitches for the sides - not to worry, too late now!!! Anyway, knitting is created by pulling a loop up through a previous stitch and putting that loop on hold on the knitting needle until it, in turn, can have another loop pulled through it. In order to attach the pocket sides, the loop for a new pocket stitch on the sides also needed to go through a corresponding garment stitch - the crochet hook could make that happen. To start a new pocket row, from the right side of the garment, put the crochet hook down through the last pocket stitch, down through the garment where you want the next row to attach, and back up through where the last pocket stitch was created. It is probably easier to let the last pocket stitch come off the needle and onto the crochet hook whilst doing this. Grab a loop of yarn with the hook and pull it back through, ending with coming through the last pocket stitch. Put the loop onto your knitting needles as the first stitch of a new pocket row. You can now work across the pocket stitches as per usual knitting until you get to the last pocket stitch.
The last stitch in a pocket row can either be attached as you work it (which is probably most secure and is what I did), or as you work the first stitch of the next row (which is probably easier). The way I did it worked similarly to the first stitch in a pocket row, the only difference being that you are creating a stitch next to the previous one and above the row below, rather than just above the previous stitch and row , and attaching it to the garment at the same time. So, with crochet hook, go down through that last pocket stitch on the previous row, letting that stitch transfer to the crochet hook and off the needle. Go down through the garment where you want the pocket stitch to attach and back up through the garment directly where the yarn is. This should be where that previous stitch in the latest row that you knitted overlies the garment. Grab a loop of yarn with the hook and pull it back through all layers. Put the loop on the knitting needle as the last stitch of the pocket row you just worked.
The “easy” version would have this last stitch only attached after you actually work it as per normal knitting - attaching when you make the first stitch of the next row.
Now, you are back to creating the first stitch of the next row. With your crochet hook, go down through the last stitch of the previous row, down through the garment where you want this new stitch to come from and back up through the garment where the last stitch attaches. Grab a loop of yarn and pull it through, placing it on the knitting needles as the first stitch of the next row, ready to work across the rest of the row up to the last stitch with normal knitting. Construct the rest of the pocket in the same fashion.
I am tempted to think that in future it might be better to do the base attachment as already described, knit the rest of the pocket without further attachment, and then come up with a sewn method of attachment that gives an invisible result … maybe a kind of duplicate stitch/weaving hybrid
Colourwork on the pocket
Oh dear oh dear oh dear!!! Definitely not my finest work!!!
I did it as a kind of combination between intarsia and stranded knitting. The colours were introduced as needed and the pink yarn carried across the back, woven in each stitch in order to try to prevent the formation of floats that could catch on things that are put in the pocket. Also, I figured that creating a nice, dense fabric for the pocket was probably a good idea. Unfortunately, I forgot that it is best to do colourwork stranding loosely - oh well!!!
In the rows where there are three colours, I carried both the pink and the cream across the back of the grey. Neither the cream nor the grey was was carried past the limits of the design, except when I was weaving in the tails as I went.
There was a great deal of rearranging, tugging, redistribution of yarn in the pocket after it was “finished” in order to get it to look halfway presentable.
Note on finishing
It was quite fortunate that some of the tails I left were very long. This meant that I was actually able to reinforce the shoulder “seams” and a couple of other areas by weaving in the yarn tails along there. This should help prevent the garment stretching out of shape in that area.
edit: Thea decided that she actually would like a second pocket. The cardigan was undergoing blocking at the time, so I couldn’t do it the same way as the first pocket. I proceeded as follows:
- JMCO the correct number of stitches for the pocket (on each needle). Put the stitches that used the tail of the yarn on hold whilst the rest of the pocket is knitted.
- we wanted the second picket to look exactly the same as the first, so I will need to undo the stitches that I had on hold and use that yarn to graft the pocket onto the (now blocked)garment, otherwise there will be too much space under the flower… I mustn’t forget to actually pu the stitches in the other cast on row so that they don’t “run” whilst I am grafting.
- I am going to attempt to do some kind of sewn duplicate stitch/weaving in combo (a frankenstitch
 ) in order to attach the sides.


 felicitymcrowe notebook
  handspun
 queue
queue favorites
 friends
 needles & hooks
 library