Sep 6, 2013:
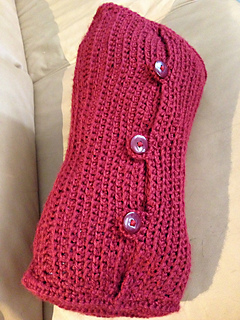
Buttons arrived in the mail, so I sewed them on and crocheted loops to go around the buttons as a closure for the cover. Now I can easily remove the cover to wash it as needed (yarn is machine wash gentle, warm dry). Love how it turned out. :-)
Sep 3, 2013:
Needed a pillow cover for one of those “Dog Bones” shaped neck pillows that’s used on the living room couch.* Made up the pattern as I went along to fit the pillow. Used an extended crochet stitch but I alternated going into the front or back loop by row to create a little different look.
-
For the main body I crocheted a rectangle the width of the neck pillow and about an inch longer than needed to overlap for buttons.
-
I crocheted 2 triangles for the sides since the dog bones shape is more of a triangle than a circle or square. Just guessed sizing once again, still using extended crochet stitch as above.
-
Ended up adding a row to each side of the main body for width and 2 rows around edge of the triangles. Looks nicer in addition to adding needed sizing.
-
When pieces completed, I then crocheted them together with a single crochet stitch.
Just waiting for buttons to arrive (ordered online) to attach to main body opening. Will update what I do with notes and pics.
I wanted the color to not only better coordinate with the living room colors but also to easily wash it every week without having to wash the entire pillow each week (the pillow insides tend to degrade and get lumpy with washing over time).
I also have a dust mite cover on the pillow, so this new crocheted pillow cover color not only goes with the living room better, it also hides the dust mite cover and can easily be removed and washed every week. Win-win-win. :-)


 shirleykaiser notebook
  handspun
 queue
queue favorites
 friends
 needles & hooks
 library